Hey, friends! I'm coming to you today with a lesson that has been rolling around in my head for a while. I know this time of the school year, so many of us focus on LINES and I thought this painting project, that could serve as a school-wide collaborative, would be perfect!
Like my more recent lesson videos, I'm doing a little bit of a teacher-talk at the start of the video to walk you through the prep process. There isn't much but I do think it's important.
I find that templates work great and just make one per table! Then the kids can add the tick marks so they know where to start and end their first lines. I think the mural would work best if those first lines were all the same. I decided to use a dark blue.
If you do this lesson and post on social media, please be sure and tag me, I'd love to see what you and your artists create! Please do not rewrite this lesson and sell on TPT as your own...I hate to say that every post but, it happens!
I Hey, y'all! Have you ever tried doing a crayon batik with your students? It's something that I've seen art teachers do and have always wanted to try but...just didn't seem to know how to make it happen. Do I use ink or acrylic paint? Do the kids rinse it off or wipe it with a sponge? Do I dilute the paint or no?
I decided to give it a go and I will say this: there was a huge learning curve! I tried several methods and came up with what worked best for me.
But! Even if you don't go the batik route, the flower drawing portion of this lesson still yields beautiful results. Says me.
Now, if you don't want to go this route, you could use this flower idea sheet to create this lesson that I did with my second graders. It's always a hit and the results are so stunning:
You can find all the details for that lesson right here! In fact, you can find ALL of my favorite art lessons for spring in that link...and most come with video!
I've always wanted to do a crayon batik lesson. I learned some things along the way and I shared a lot of those tips in the video. But...here are some other things I'd recommend:
* Use thick paper Because this paper is going to be crumpled and then saturated with paint and water, it could tear easily if thin paper is used. I'm using 80 lbs. mixed media paper.
* Work small I learned this the hard way! Because students will be adding color by firmly coloring with crayon, be ready for a little coloring fatigue. A way around that is to use small paper. I used 6" and 4" squares. I wouldn't recommend anything larger!
* Use India ink, not paint I noticed that with acrylic paint, it didn't really stay in the crumbled areas once rinsed where the permanent ink did.
* Crumble the paper ONCE I tried crumbling the paper multiple times to add more cracks and you can see that in the piece that is in the golden frame. However, once I rinsed the ink off the paper, all those cracks caused weak spots in the paper and it did tear in a couple of places. Which leads me to my next suggestion:
* Rinse once and that's it! I would recommend students carry their artwork to you on a tray so as not to drip. Then, simply slide the artwork under the running water, allow the ink to rinse off quickly and then set on a paper-towel covered surface like a counter. This should be a quick process to keep the paper from becoming too saturated and fragile.
And...by the way...the "gold frame" I used for mine is actually a paper plate from Hobby Lobby! I spotted them a while back and had to get them to frame student artwork in!
Also! Are you going to NAEA next week? If so, I'd love to see you there! I'll be hanging out with my friends at Prang in their booth number 117. I'll be there on Thursday, March 20th and Friday, March 21st from 11am - 2pm. I'll have all of my books with me to sell and sign. Prang has some super fun hands-on activities planned for you that I know you'll love!
Hey, friends! I'm coming at you today with a fun lesson that's the perfect thing to introduce collage, ignite the imagination and review shapes...a Sandwich Collage!
I shared a similar lesson years ago and you can find it here. And, if you want to continue on the food theme, I have a whole unit of lessons for you! It's one of my fave themes and you can find details here.
For this lesson, all you'll need is construction paper, glue or a glue stick, scissors and maybe markers and crayons. I created this video for you to play for your students so...have fun!
For a quick link to the supplies I am using, jump over here!
I mentioned that this lesson would be a great way to reintroduce the element of art of SHAPES to your students. When I wrote my book Alfred the Ape Knows his Shapes, I wanted it to go beyond the basic shape books I had on hand. So I dug into the first and second grade curriculum on shapes and made sure to include that.
As an art teacher, I focused on geometric and organic shapes. However, in the classroom, teachers talk a lot about sides and vertices. Which...I learned from my students! To support the classroom teachers and continue the education of shapes in the art room, I included the vocabulary and standards in my book.
Because Alfred the Ape Knows his Shapes introduces so much, I recommend reading it in two parts! On the first day of the collage project, try reading about how line creates shape, the difference between organic and geometric shapes and what makes a shape. The first half of the book chats about geometric shapes, what makes them unique and how to tell them apart. From there, the book discusses organic shapes. Perhaps that could be discussed on the second day, when the artists focus on the organic shapes of the food they wish to include in their collage sandwich.
By the way, if you are interested in checking out free lessons and downloads, you may want to subscribe to my email list! You can do so here.
And often I share videos on YouTube before I have a chance to chat about them here. So...be sure to subscribe! You can do so here.
That time of the year when your classes may be a little LESS focused and a little MORE squirrelly. For me, that stretch between winter and spring break is always the longest. This is when the burnout always seems to hit me AND my students.
For that reason, I'm always looking to try a little something new and different this time of year. Something (anything!) to keep myself and the kids engaged and excited.
So, if that's you too, let me share my favorite way to create a calm and motived art class...while also integrating art history!
When I was in fourth grade, I had a teacher who would read aloud from a chapter book after recess. I don't remember what the book was but I do remember that it was something I looked forward to.
Several years ago, I had a very difficult group of fourth grade students. They were argumentative, loud and VERY unmotivated. I had one boy in particular who let it be known that art WAS NOT his favorite. I began to dread the class.
One day, I spotted a chapter book in my storage closet. I remembered my fourth gade teacher and thought...what if I read to them while they work? I loved it when I was a kid...
When the class arrived, I told them that I was going to read to them and taht they had to work quietly in order to hear. I animated the story with silly voices, sound effects and movement. When the clean up alarm went off, something wild happened: the kids and I were bummed art class was over!
From there, reading became my constant motivational tool. After I gave directions and students were settled in and working, I would read. And that boy who previously wasn't a fan of art class? He asked if he could sit CLOSER to my destk so he wouldn't miss any of the story.
While I felt like I'd hit the art teacherin' jack pot with this new tool in my tool belt, what I still wasn't lovin' was that I could never seem to find THE PERFECT book to read.
You see, I wanted to read an artsy chapter book. Something that would excite them about the world of art and art history. So...I wrote one!
I knew their favorite types of books were the ones where they could decide their adventure. And that's how Find Your Way came to be. It's a Decide Your Direction Art Adventure!
Find Your Way features 7 artists: Leonardo da Vinci, Salvador Dali, Frida Kahlo, Augusta Savage, Hokusai, Vincent van Gogh and Claude Monet.
There are over 32 endings in the book for countless adventures!
The book is filled with quotes from the artists as well as adventures based on their real life events.
I created over 80 illustratios to help bring the book to life for your artists.
Also included are 7 biographies on each artist as well as 7 art activies.
I wrote Find Your Way while I was teaching. My students weighed in on my first, second and third drafts as I would edit and rewrite in the evenings and weekends. They enjoyed the adventures....and I know your students will too.
But you don't have to read Find Your Way to have an engaged and motivated class. Maybe start with a book or an author that you loved as a kid! I have always found that the best sources for inspiration are my own childhood interests.
Most of all, go easy on yourself, take a breath and have fun. This time of the year is tough! But so are you.
Today I'm sharing lessons that are also Valentine's themed (or really heart/love themed!) but there are a little more in-depth and will take multiple class periods. Personally...I love a long project for these long winter days. It means less prep (after the first initial wave of tons of prep, ha!) and gives the kids something to really dig their teeth into. So, let's dive in! Just follow the lesson links and that will take you to the full lesson, video and resources!
Let's start strong with this Candy Hearts lesson that I did with my fourth graders! They loved creating large candy hearts and coming up with a (teacher-approved, ahem) saying. You can check out the lesson and video process here.
Spring is when I LOVE to dive into weaving so...why not get everyone prepped by doing a paper weaving project? It's a great way to remind your students of the weaving process. Or...introduce them to it! This is a weaving (with a little bit of sewing) project that I did with my first graders. You can check it out here.
Looking to dive into printmaking in the next couple of weeks? Here's a lesson that I did year after year with my second graders because it was such a hit! We made so many prints that we did some print swaps before adding our cut letters to these pieces. We even framed them with our scrappy messy mats! All the details can be found here.
Speaking of printmaking, would you believe that kindergarten created these?! We used foam stickers and had a blast. You can check out the lesson here.
My third graders FLIPPED OUT over creating these plaster chocolates with puffy paint icing! Send out an email requesting heart shaped boxes now and use them for a display or, do what we did, and make your own! Details here.
In the mood to try a new art supply? For these, we used Celluclay, one of my personal favorite supplies to use when I create! These were made with an aluminum foil armature and Celluclay on top. You can check out the details here.
Since these projects can take a while, you'll find you have some students who finish before others. I resolve that a couple of ways: I allow those students to 'assist' other artists by creating with them (with student permission, of course) or...I give them another lesson to do! This was one of those 'early finisher art lessons' that I created. I simply played the video for those kids and they got to work. This one is much easier than it looks! Here's the details!
Well, hello there! As you can see, I am CLEARLY snow globe obsessed at the moment. I shared my first Snow Globe lesson here and then shared a floating chalk print version here. Today I thought I'd share a version of adding color the background with little marker and water. As a teacher...or a parent who loves to create with their artsy kiddos, these ideas will give you three fun options for completing your snow globes!
Let's talk supplies:
* Pizza pan, a sheet of aluminum foil or any non-porous, flat surface
* Paper. I'm using a mixed media paper or one that's a little thicker than copy paper.
What I did find is that the lighter color markers work best...as the darker color markers are a little too dark and may hide the drawing underneath. But the real fun is in drawing a lotta these globes so you can explore a lotta printing. Also...I have found that using one of those misting spray bottles is the best as opposed to a regular spray bottle. AND the pizza pan is from Dollar Tree!
I've got a lotta winter videos coming to my YouTube channel soon. So if you need some inspo, the best way to stay up to date is to subscribe. You can do that here. Chat soon!
Today I'm sharing my 25 Favorite Valentines/Love-Themed art lessons! From sub plans with handouts to clay and plaster projects, I've got something for everyone...including printmaking with kindergarten! Most of these lessons include kid-friendly videos, some have handouts and all are FREE! I hope you enjoy and...
Happy New Year!
I know next week means heading back to school...and it's just so hard to do after weeks off. I thought I'd try and ease the sting a little by offering up to you my favorite fun and easy lessons for celebrating LOVE as Valentine's Day is on the horizon. It's never too soon to start those Valentine's themed lessons and NEVER NOT a great opportunity to celebrate all things lovey dovey. Many of these lessons here come with a kid-friendly how-to video and, best of all, they're free! Just tap the highlighted link for more!
The above is a lesson I created for my kindergarten friends but it was so fun that I ended up doing it with several grade levels. It's that time of year when you really just wanna ease on back into art teacherin', right? So why not do so with a project where you just gotta get out one art supply (tempera paint and black oil pastels) and call it a day? It's much more relaxing that way...and when you are happy and relaxed, it will reflect in your teaching (and, hopefully, the students).
One of my all-time favorite things to teach first grade is...paper weaving! And I know what some of you may be thinking: SERIOUSLY?! Yes...because I got it down to a science! They make the looms, we weave together on a big loom I created, we do this on the floor and help one another...it's so fun! Here's the full lesson!
Nearly all of these lessons here are inspired by artists! Which means that students learn a little about both contemporary artists as well as artists of the past with these projects. Here we learned about Jen Stark!
For me, back to school after a long break meant back to the basics...a review of rules, routines and expectations. I cover all of that in my book Art Teacherin' 101...it's always a good time to get a handle on classroom management. No matter how could it is, it could ALWAYS be better, right? I share all of my tips and tricks in that book, if you are interested!
Of course, sometimes it's fun to just jump right back in with big and exciting projects! I've been all about the plaster and Celluclay in my own artwork lately...and kids do love it! More here.
Of course, back to school usually means PD meetings. One year, I convinced my admin to let me lead a workshop on creating these clay hearts with wings! I loved doing workshops with my faculty. It was a fun way to get everyone together in a relaxed way (which we never seem to do!) and enjoy creating and each other's company. To teach such a large group, I created a how-to video.
As you know, teachers are some of the worst students (I'd insert a laugh emoji but we all know it's true!) so having a pre-recorded video will help!
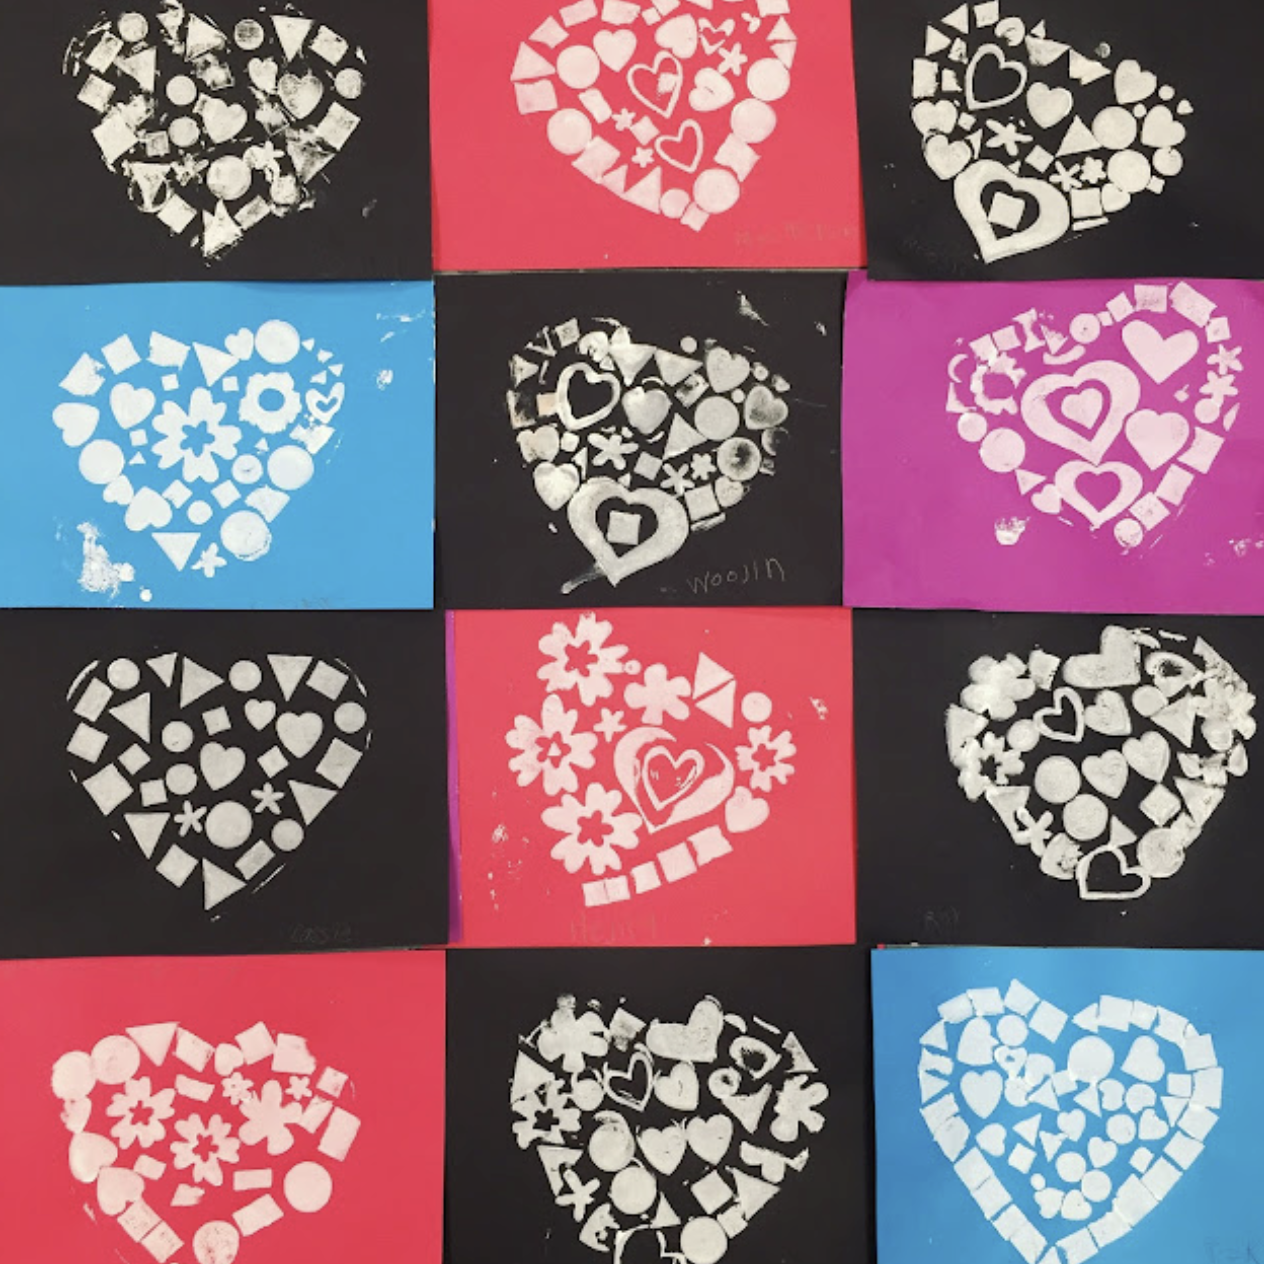
I've never met a kid who didn't LOVE printmaking! But it can be daunting and super messy...which means a lot of clean up for us. However...you CAN do printmaking with just markers and Styrofoam. Let me show you how we made these!
Wow! Did we LOVE creating these (see what I did there?!) And I have an easy method for you to make each one successful. You can check it out here!
This is a project I did with my second graders and they loved it! You can check out the video tutorial and lesson details right here!
Here's a fun lesson I put together to do in one class period! Well, for me, it took 2 classes as my class period is 30 minutes long. I did this with my fourth graders as a way to introduce them to four different artists...in one lesson! Check it out here.
Did we have fun with this one! We used old candy heart boxes and plaster to create our own faux chocolates. We also used tagboard and newspaper to create our candy boxes. It was so stinkin' fun. Full lesson here.
Look how realistic! Did I mention we used puffy paint?! Everything is better with puffy paint.
I really like to work big with my students. The bigger the paper, the better! It's a challenge with storage...but it's so worth it. These hearts were created on huge squares of paper. We chatted about Britto and did a line review...
Speaking of line...if you need a book to teach (or review) line with your students, did you hear I wrote a children's book!? Yep! it's called Larry the Line. If you are familiar with my Larry the Line poem, let me tell you this is the longer more in-depth version with idea sheets to be printed and shared in the back! You can pick up a copy here.
Big thanks to all of you that have purchased a copy and left a review! 83 5-star reviews is so amazing! Thank you all so much for the love and support. Okay, back to the lessons...
Another super popular lesson on my blog: My Chris Uphues Lesson! This one is perfect for a sub plan as it comes with a free handout.
Check out these scrappy hearts made by first grade! This was actually a lesson with a focus on positive and negative space. The kids were so excited by the negative space their cut out hearts created that we filled the space with tissue paper on plastic. More here.
Aren't they so pretty up close?
And this is what we did with the hearts we cut out! Just black and white painted designs. Simple and so pretty!
Once your students are done printmaking, you can take the hearts and create THESE! Aren't they so pretty?!
Got scraps of painted paper laying about?! You're an art teacher, of course you do! Spend some time teaching the kids how to cute out hearts and create these cuties! Use them to hang as mobiles, put them in windows, send to faculty as love notes...the possibilities are endless. Details here.
Thanks for dropping by, y'all! Know that it's TOTALLY OKAY to ease on in to this new school year. The slow you go...the more they will GROW, I promise! Slow it down, focus on what matters and enjoy art teacherin!


.jpg)


.jpg)


.jpg)